Required packages
The Object Capture for Unity Kit contains interfaces for augmented reality functions and implements these functions itself. You do not need any additional packages or tools to use AR.
Features
Creating a 3D model:
The Object Capture for Unity Kit allows you to create a 3D model of any scanned object (area) using device sensors, trained machine learning models, and Unity's rendering capabilities.
Photogrammetry:
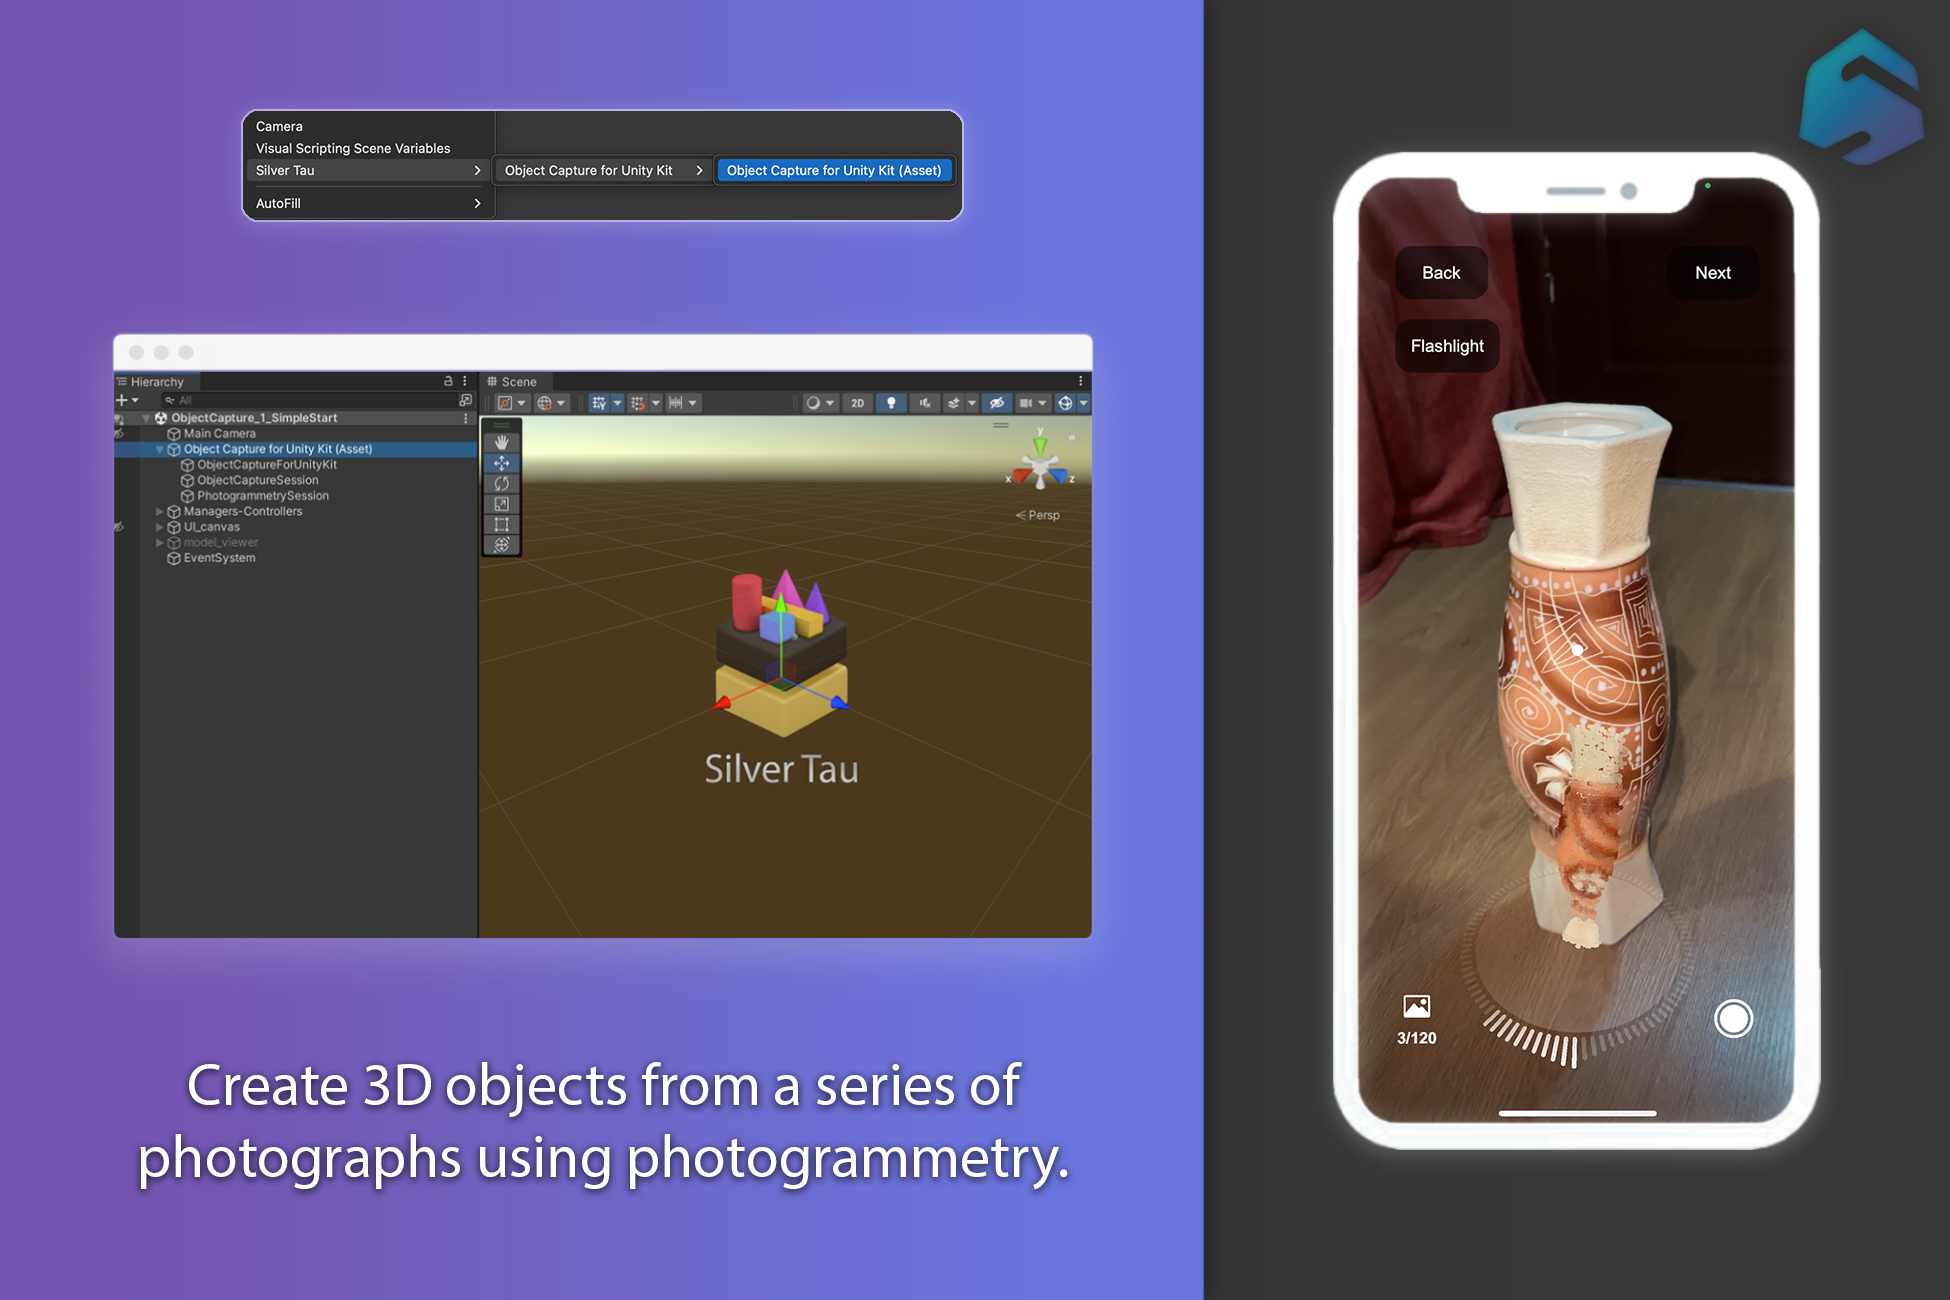
Create 3D objects from a series of photos, either your own or taken in the app, using photogrammetry. (Photogrammetry for iOS and macOS platforms)
High-Speed:
Engineered and extensively optimized for superior performance.
Quality:
Take high-quality images of objects to generate 3D models.
Displaying AR tips:
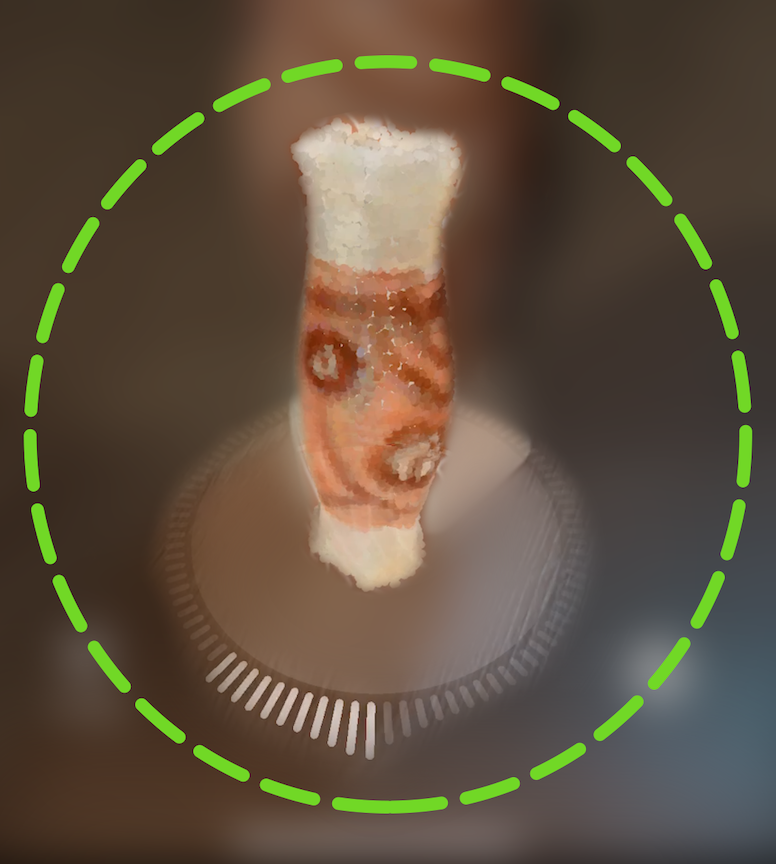
During the scan, users receive virtual on-screen prompts that indicate the direction and progress of the scan.
Export 3D model:
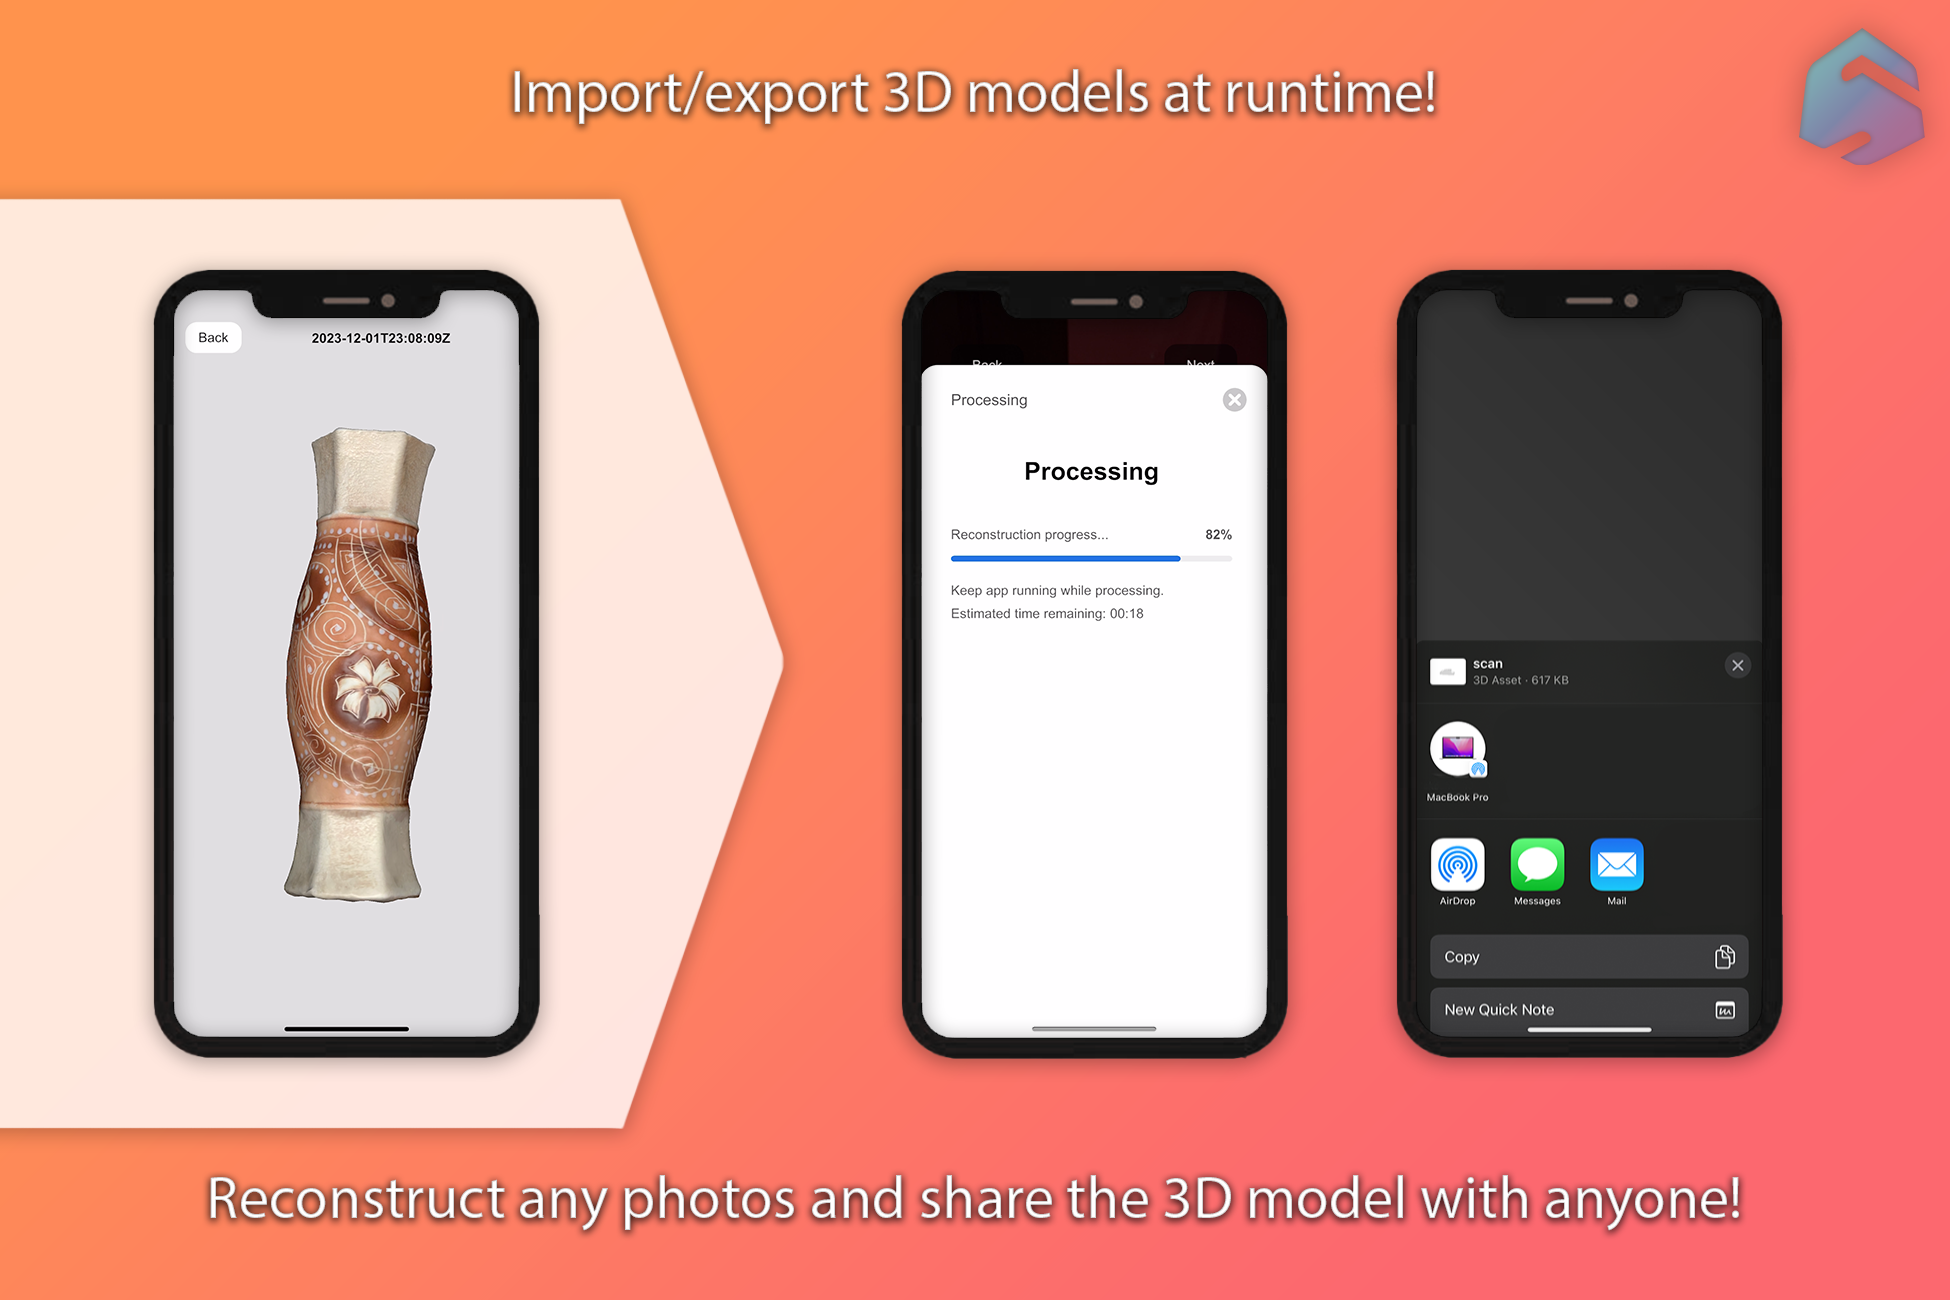
After scanning an object, you can export a 3D model in various 3D formats (.obj, .ply, .usda, .usdc, .usdz).
Flashlight utility:
With this utility, you can control the device's flashlight anytime.
Quick Look utility:
You can use Quick Look in your app so that users can see incredibly detailed visualizations of objects in the real world quickly and easily.
Share utility:
With this utility, you can easily share any files and folders.
Import/Export 3D model (.obj):
Using the utilities developed and built into the plugin, you can easily import Unity models into both the Runtime and Editor.
USDZ Utility:
Easily convert and export any GameObjects (3D) to a .USDZ model file and use them in your applications, preview them with the QuickLook utility, or share them with the Share utility.
Lightweight Integration:
The API is purposefully designed to minimize unnecessary additions or extra burden on your project.
Components:
Platform support
The Object Capture plugin for the Unity Kit relies on platform-specific implementations of augmented reality features, such as Apple's ARKit on iOS/iPadOS. Not all features are available on all platforms.
iOS/iPadOS version:
- OS 17+
- LiDAR Scanner
- A14 Bionic chip or later
macOS version:
Note
For macOS, only the phogrammetry (reconstruction) functionality is supported.
Limitations
Devices:
All devices with a LIDAR sensor are supported for scanning mode.
Note
Devices that do not have a LIDAR sensor cannot perform the scanning process, but they can perform all other functions.
Samples
Samples.
Object Capture for Unity Kit (Default):
| ObjectCapture_1_SimpleStart |
An example of a scene that demonstrates how the plugin works with the basic settings. |
| ObjectCapture_2_Photogrammetry |
An example of a scene that demonstrates how the plugin works with the ability to reconstruct and create 3D models from a series of images. |
| ObjectCapture_3_CameraCaptureImage |
An example of a scene that demonstrates how the plugin works with the ability to create high-resolution photos with depth and gravity data. |
Object Capture for Unity Kit (macOS):
| ObjectCapture_macOS_1_Photogrammetry |
An example of a scene that demonstrates how the plugin works with the ability to reconstruct and create 3D models from a series of images. |
Utilities:
| ObjectCapture_QuickLook |
An example of a scene that demonstrates how the QuickLook utility works. |
| ObjectCapture_OBJUtility |
An example of a scene that demonstrates how the OBJ utility works. |
| ObjectCapture_Share |
An example of a scene that demonstrates how the Share utility works |
| ObjectCapture_Flashlight |
An example of a scene that demonstrates how the Flashlight utility works |
| ObjectCapture_USDZUtility |
An example of a scene that demonstrates how the USDZ utility works |
Install Object Capture for Unity Kit
To install Object Capture for Unity Kit, simply import the package into your project.
Note
Make sure that the "Add to embedded binaries" option is enabled for the ObjectCaptureAPIForUnity.framework and the ObjectCaptureForUnityKit_ST_Lib.dll library in the editor inspector.
Tip
Don't forget to set the value for the camera description and the minimum version of iOS/iPadOS.
Scene setup
Each AR scene in your app must have two mandatory GameObjects: Object Capture for Unity Kit, Object Capture Session, or Photogrammetry Session.
The GameObject Object Capture for Unity Kit enables and controls AR on the target platform, the Object Capture Session interacts with the framework and builds scanned 3D objects in real time, and the GameObject Photogrammetry Session reconstructs the scanned object from photos. If one of these GameObjects is missing from the scene, augmented reality will not work properly.
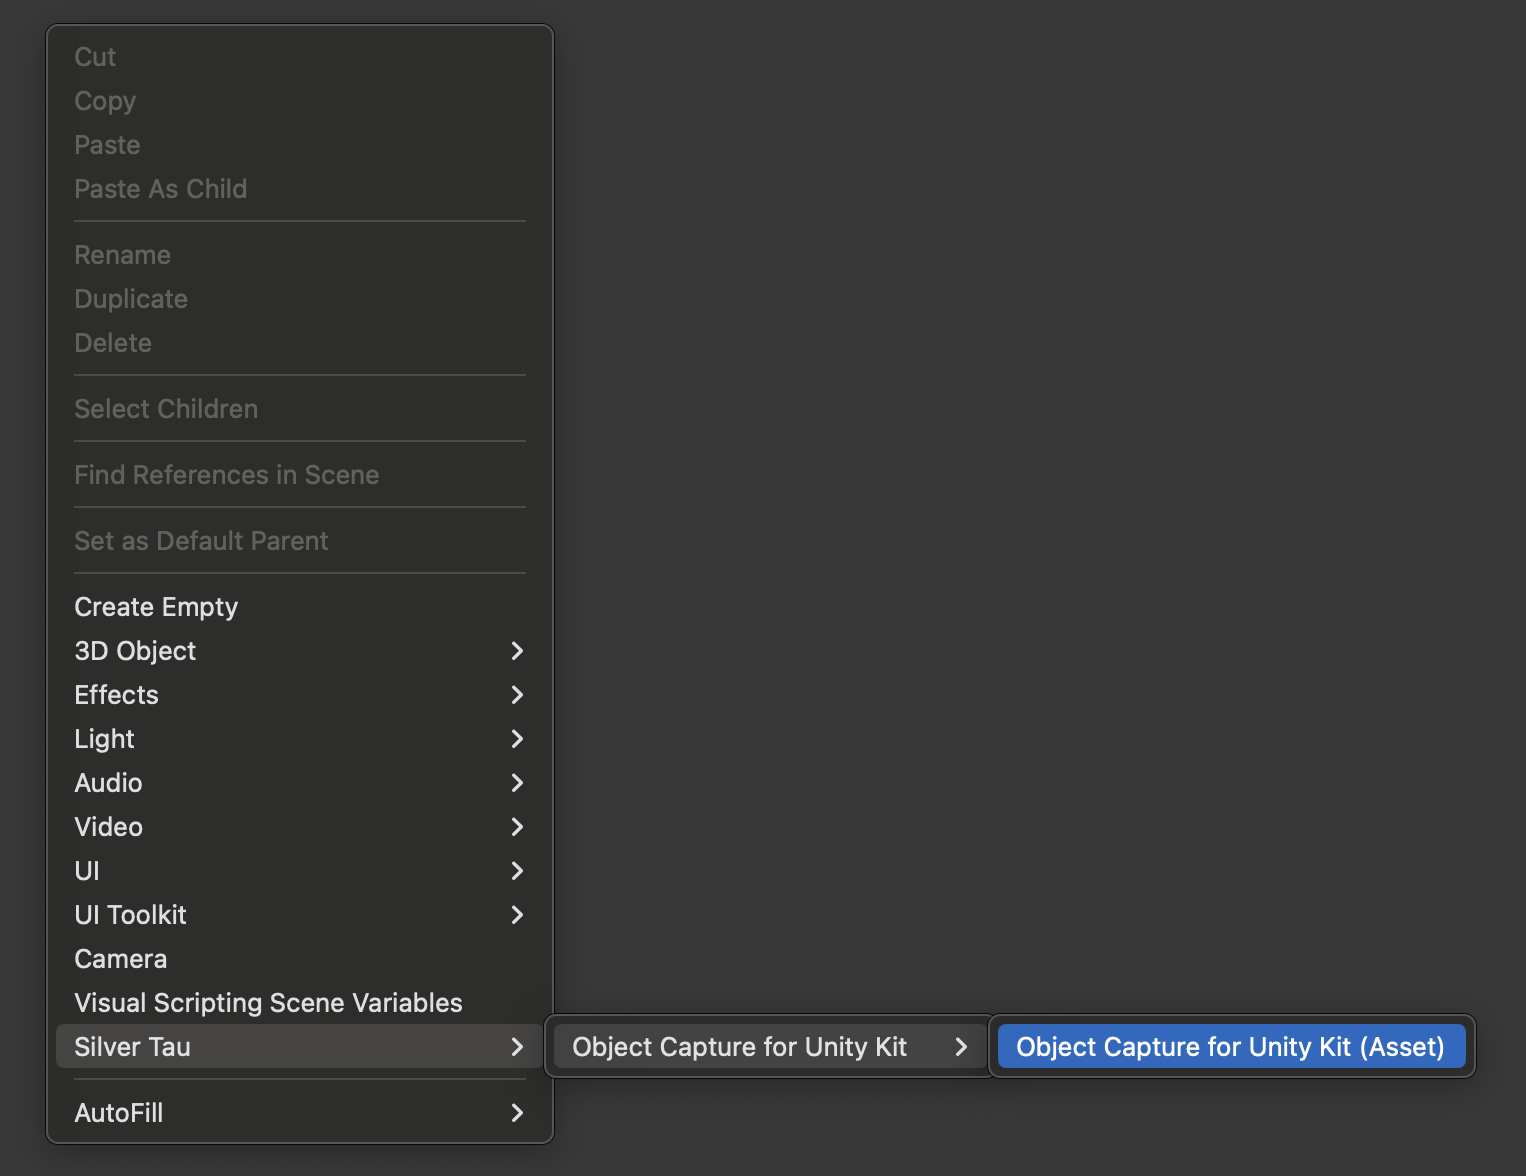
To create an Object Capture for Unity Kit, Object Capture Session, or Photogrammetry Session, right-click in the Hierarchy window and choose one of the following options from the shortcut menu.
Silver Tau > Object Capture for Unity Kit > Object Capture for Unity Kit
or
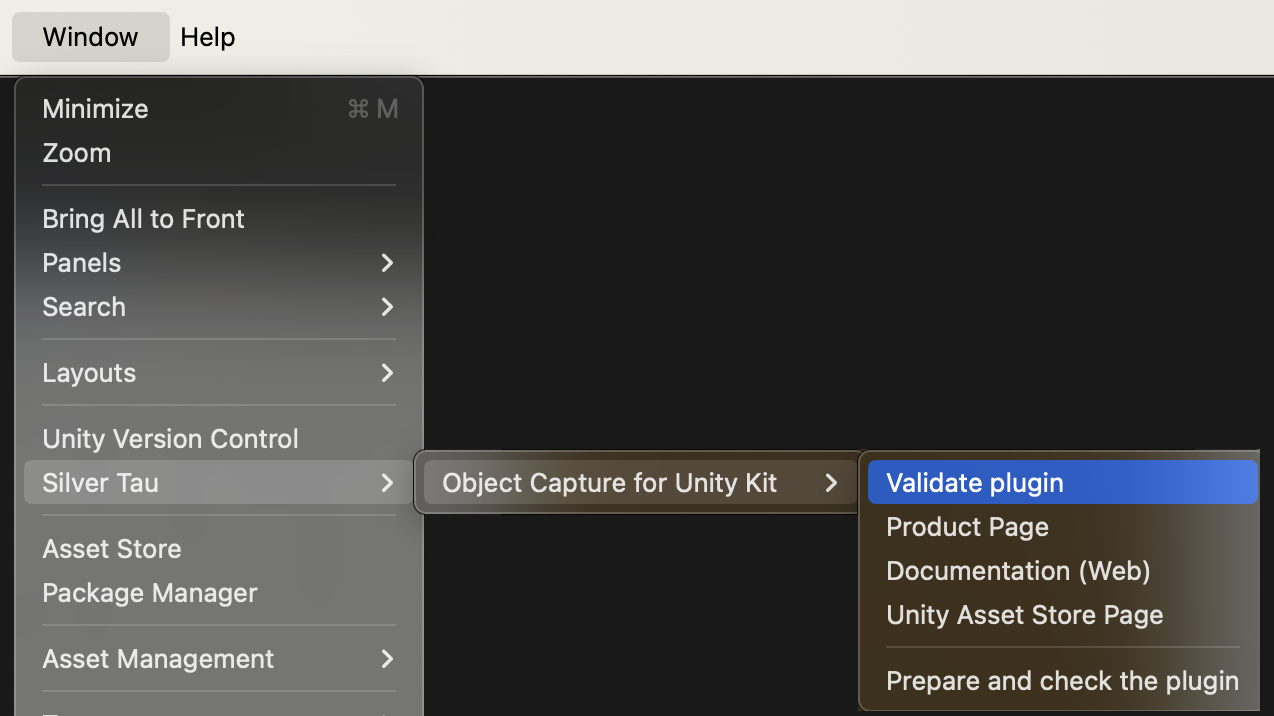
Window > Silver Tau > Object Capture for Unity Kit > Prepare and check the plugin
After adding the Object Capture for Unity Kit (Asset) to the scene, the hierarchy window will look like the one below.
This is the default scene setup, but you can rename or change the parentage of the GameObjects to suit your project's needs.
The Object Capture for Unity Kit, Object Capture Session or Photogrammetry Session GameObjects and their components play an important role in the project.
Universal Render Pipeline
No special settings are required when using the Universal Render Pipeline. The whole process is automated.
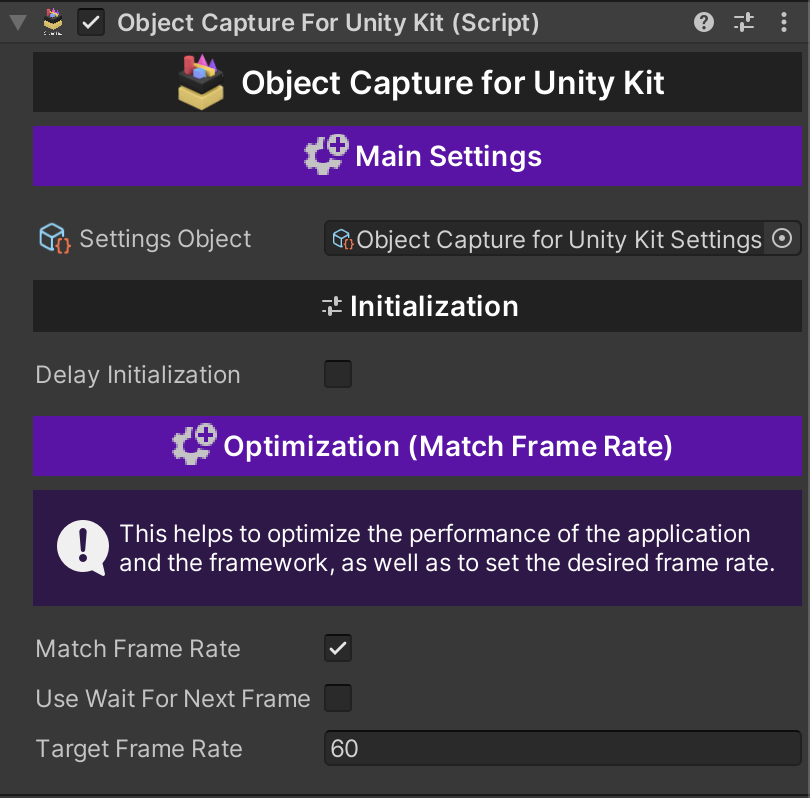
Object Capture for Unity Kit
The main component that creates the connection between the Unity engine and the Object Capture framework.
Take high-quality images of objects to generate 3D models.
In iOS 17 and later you can create 3D objects from photographs using a process called photogrammetry. You provide Object Capture with a series of well-lit photographs taken from many different angles. It analyzes the overlap area between different images to match up landmarks, and then produces a 3D model of the photographed object.
To generate the best 3D representation from the object-creation process, provide with high-quality, high-resolution photographs that don’t contain hard shadows or strong highlights.
Select an object to photograph
Choose objects that are static and won’t bend or deform while you’re taking photos. You can move the object between shots in order to photograph all sides, but a soft, articulated, or bendable object that changes shape when you move it can compromise framework ability to match landmarks between different images, which may cause Object Capture to fail or produce low-quality results.
Avoid objects that are very thin in one dimension, highly reflective, transparent, or translucent. Additionally, objects that are a single, solid color or have a very smooth surface may not provide enough data necessary for the object-creation algorithm to construct a 3D shape.
Choose an approach
You can approach taking photographs for object creation in two ways: Either move the camera around the object, taking photographs from different angles at different heights, or put the object on a turntable and rotate the object while taking pictures. When using a turntable, take pictures in front of a well-lit, solid color background to minimize extraneous image data that can interfere with the object-creation process and use a tripod if available. Standing the object on different sides while photographing it on a turntable captures the entire object with no gaps or holes.
The number of pictures that RealityKit needs in order to create an accurate 3D representation varies depending on the complexity and size of the object, but adjacent shots must have substantial overlap. Position sequential images so they have a 70% overlap or more. Anything less than 50% overlap between neighboring shots, and the object-creation process may fail or result in a low-quality recreation.
Compose your shots
Position the object so it fills as much of the camera’s frame as possible without excluding or cutting off any part. Use an aperture setting narrow enough to maintain a crisp focus. Shoot at the highest resolution your camera supports and use RAW format if possible.
In low-light situations, cameras with autofocus can have difficulty finding and maintaining focus. Focus manually if there isn’t enough ambient light to get a focus lock, and put your camera on a tripod to make sure you keep it steady. Use a remote trigger, such as the Apple Watch Camera Remote app, to make sure the camera doesn’t move or shake when you press the button to take a photo.
Use diffused lighting if possible. Hard light, such as from an on-camera flash, direct sunlight, or a bare light bulb can cause problems during object creation. This type of lighting casts hard shadows that can confuse the photogrammetry algorithm. Instead, bounce the light off of a reflector, a wall, or the ceiling, or put a diffusing material like a lamp shade or thin white fabric between the light source and the object. You can also use light modifiers or a light tent designed for photographing objects.
When photographing an object outdoors, keep the sun out of your images if possible. Shoot at midday so the sun is high enough in the sky that it won’t be visible in any of your images, or shoot on an overcast day.
Capture consistent images and perform post-processing
In order to ensure that RealityKit can match up landmarks between overlapping photographs, keep your camera settings as consistent as possible from shot to shot. If possible, don’t make changes to any camera settings while shooting, including the focal length (zoom), aperture, shutter speed, or ISO.
If your camera offers manual control of any settings, set those values to keep them consistent between shots. When shooting with the camera on an iPhone or iPad, you can lock the exposure and focus settings by long-pressing the image feed view until you see “AE/AF Lock” appear at the top of the screen.
In addition, masking out objects in the background so the image only contains the object you’re capturing removes unnecessary data that can confuse the photogrammetry algorithm.
There may be times when you can’t capture images under ideal conditions, such as when photographing a large object in a crowded public space. Adjust for image shortcomings using an image editor. Modify a photograph’s contrast, brightness, sharpness, or exposure to compensate for problems in the original capture.
Actions
Use this to create some dynamic functionality in your scripts. Unity Actions allow you to dynamically call multiple functions.
| didStart |
An action called when the framework is initialized. With this action, you can track the status of the framework initialization. |
| didEnd |
An action that is called when a framework is disposed of. With this action, you can track the status of the disposed of framework and you can given it additional actions. |
Examples of use:
//A function that initializes a framework.
//Use it if the framework has not been initialized before.
ObjectCaptureForUnityKit.Initialize();
//A function that disposes of a framework.
//Use it if you want to unload the framework.
ObjectCaptureForUnityKit.Dispose();
//A method that updates the main Object Capture settings in real time.
//By updating Object Capture Unity Kit Settings, all settings will be applied.
ObjectCaptureForUnityKit.UpdateSettingsObject();
//By updating Object Capture Unity Kit Settings, all settings will be applied.
ObjectCaptureForUnityKit.IsSupported();
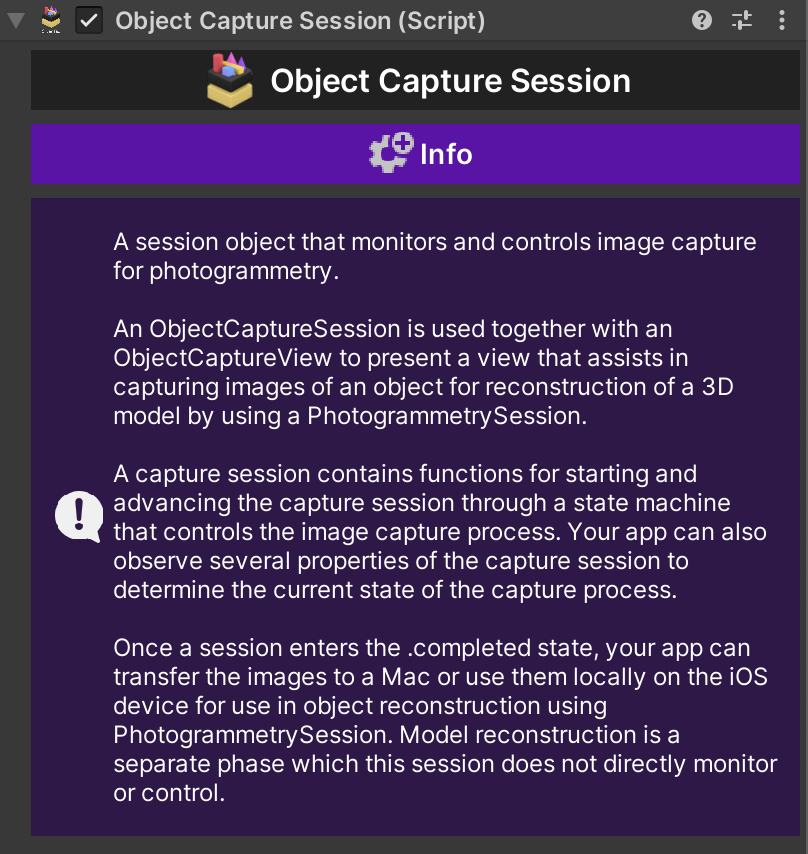
Object Capture Session
A session object that monitors and controls image capture for photogrammetry.
An ObjectCaptureSession is used together with an ObjectCaptureView to present a view that assists in capturing images of an object for reconstruction of a 3D model by using a PhotogrammetrySession.
A capture session contains functions for starting and advancing the capture session through a state machine that controls the image capture process. Your app can also observe several properties of the capture session to determine the current state of the capture process.
Once a session enters the .completed state, your app can transfer the images to a Mac or use them locally on the iOS device for use in object reconstruction using PhotogrammetrySession. Model reconstruction is a separate phase which this session does not directly monitor or control.
Events
| OnError |
Errors associated with the top-level computation of this class. |
| OnCaptureState |
State of the capture session. |
| OnFeedback |
Provides information about possible problems with the capture session. |
| OnTracking |
A data structure that describes the current tracking state for the camera. |
| OnImageCapture |
An event to track the creation of an image. |
| OnUserCompletedScanPass |
A tracking event when the user moves the device around the target object and collects enough data to completely fill the capture dial. |
Properties
| CurrentRootScanFolder |
Current scan root folder. |
| CurrentImagesFolder |
Current folder with images. |
| CurrentSnapshotsFolder |
Current folder with snapshots. |
| CurrentModelsFolder |
Current models folder. |
| MaximumNumberOfInputImages |
The maximum number of images that can be used for on-device reconstruction. |
| NumberOfShotsTaken |
The number of shots taken in the entire capture session so far, including both automatic capture and manual capture. |
| UserCompletedScanPass |
This property starts out “false” at the start of a capture and will switch to “true” when the user has moved the device in a full circular scan pass around the bounding box of the target object and captured enough data to fill completely the capture dial.
It is reset to “false” in a given capture session whenever either:
1. “ObjectCaptureSession.beginNewScanPassAfterFlip()” is called to start a new scan pass for a flipped object.
or
2. “ObjectCaptureSession.beginNewScanPass()” is called to start a new scan pass on an unflipped object.
|
| error |
Errors associated with the top-level computation of this class. |
| captureState |
State of the capture session. |
| feedback |
Provides information about possible problems with the capture session. |
| tracking |
A data structure that describes the current tracking state for the camera. |
Functions
| UpdateSettings |
The method that updates the settings. |
| StartObjectCaptureSession |
Starts the session with the provided output image directory and optional checkpoint directory. |
| StartDetecting |
Requests that the session should start detecting the object in the center of the camera. |
| ChangeDetectObjectSize |
A method that allows you to change the size and rotation of the found object. |
| StartCapturing |
Begins taking images for object capture.
This call moves the session state from ".detecting" into ".capturing" and is meant to be called after the user chooses the object selection bounding box and wish to start the capture process.
After this call, the session transitions to ".capturing".
|
| ResetDetection |
Moves the session state from ".detecting" back to ".ready" to reset the bounding box and prepare to select a new one with a new call to "startDetecting()".
If the session is not in ".detecting" state this will return false and have no effect.
This call allows the object selection process to be restarted from scratch by the user if the wrong object is automatically selected or the user wants to discard manual bounding box edits and rerun the automatic selection process.
|
| CancelCaptureSession |
Requests that the capture session be canceled.
Call this when the user indicates they want to cancel the scan. Calling this method eventually transitions the session to ".failed(Error)".
Once the session enters the failed state it is safe to tear down the session and create a new one if desired.
|
| PauseCaptureSession |
Pauses the automatic capture and other resource-intense algorithms.
Call this when object capture view is not visible, such as when a help screen is shown.
|
| ResumeCaptureSession |
Resumes object tracking algorithms after "ObjectCaptureSession.PauseCaptureSession()" is called.
Call this method when the object capture view first appears on the screen, or after "PauseCaptureSession()" is called to show another view temporarily.
|
| FinishCaptureSession |
Requests that the capture session be stopped and all data saved.
Call this method when the user has completed the scan successfully. The session switches to state ".finishing" while it saves all data and ultimately switches the state to ".completed".
The session ignores this method call if the current state is any value other than ".capturing".
|
| BeginNewScanPass |
Resets the state of the capture dial such that the user will need to perform another complete scan pass to fill it and generate a new event in the published property "ObjectCaptureSession.userCompletedScanPass".
This is intended to be used once the user has completed one scan pass and another scan pass at a different height is desired *without flipping the object*. The same object selection box chosen previously is used, so no new box is chosen. This call is particularly useful for the case where the object is not flippable but multiple passes at different heights are needed to fully capture the object.
This call will throw if the session is not in ".capturing" state (or ".paused" from ".capturing" state).
Note: If the object is flipped and a new scan pass is required, "ObjectCaptureSession.BeginNewScanPassAfterFlip()" should be called.
|
| BeginNewScanPassAfterFlip |
Starts the capturing of a new side of the object, to be called after the object is scanned one side and flipped.
After capturing one side of an object, the session can be paused and the user can be prompted to flip the object to a new side (e.g. the bottom showing) and then "ObjectCaptureSession.BeginNewScanPassAfterFlip()" called. This will transition the session back to the ".ready" state waiting for a new bounding box selection phase to ensure the correct object is captured. Since the object has been flipped, the miniview capture display.
All captured images are written to the same output directories and the reconstruction process in "PhotogrammetrySession" will stitch these multiple captures together automatically.
Note: "ObjectCaptureSession.BeginNewScanPassAfterFlip()" should be called *after* the object flipped for best results.
See also "ObjectCaptureSession.BeginNewScanPass()" for the case where the object was not flipped but another capture circle at a different height will be performed on the same side instead.
|
| OnUserCompletedScanPass |
Manual image capture.
Requests a manual image capture.
If the session's state is ".capturing", call this method to request an image be manually captured at the current location.
|
| SetOverCapture |
If the "numberOfShotsTaken > maximumNumberOfInputImages" then any additional shots will not be used in an on-device reconstruction and reconstruction is recommended to be done on a Mac that can support a greater number of images. |
| SetMinNumImages |
The minimum number of images for a scanning session pass. |
| SetModelScanInfo |
Setting the target folder for the scan. |
| StopObjectCaptureSession |
Requests to stop the capture session and stop all data. |
| SetCaptureMode |
Setting the target capture mode. |
Examples of use:
public class ObjectCapture : MonoBehaviour
{
  // Begins taking images for object capture.
  public void StartCapturing()
  {
    ObjectCaptureSession.StartCapturing();
  }
}
public class ObjectCapture : MonoBehaviour
{
  // Requests that the session should start detecting the object in the center of the camera.
  public void StartDetecting()
  {
    ObjectCaptureSession.StartDetecting();
  }
}
public class ObjectCapture : MonoBehaviour
{
  // Reset detection.
  public void ResetDetection()
  {
    ObjectCaptureSession.ResetDetection();
  }
}
public class ObjectCapture : MonoBehaviour
{
  // A method that allows you to change the size and rotation of the found object.
  public void ChangeDetectObjectSize(bool value)
  {
    ObjectCaptureSession.ChangeDetectObjectSize(value);
  }
}
public class ObjectCapture : MonoBehaviour
{
  // Pauses the automatic capture and other resource-intense algorithms.
  public void PauseCaptureSession()
  {
    ObjectCaptureSession.PauseCaptureSession();
  }
}
public class ObjectCapture : MonoBehaviour
{
  // Resumes object tracking algorithms after ``ObjectCaptureSession.PauseCaptureSession()`` is called.
  public void ResumeCaptureSession()
  {
    ObjectCaptureSession.ResumeCaptureSession();
  }
}
public class ObjectCapture : MonoBehaviour
{
  // Manual image capture.
  public void ManualImageCapture()
  {
    ObjectCaptureSession.ManualImageCapture();
  }
}
public class ObjectCapture : MonoBehaviour
{
  // A function that completes the scanning process with further reconstruction actions.
  public void FinishCaptureSession()
  {
    ObjectCaptureSession.FinishCaptureSession();
  }
}
public class ObjectCapture : MonoBehaviour
{
  private bool _isObjectFlipped;
  private bool _isCantFlipObject;

  // A function that starts a new scanning phase.
  public void StartNewScanPass()
  {
    if (_isObjectFlipped && !_isCantFlipObject)
    {
        ObjectCaptureSession.BeginNewScanPassAfterFlip();
    }
    else
    {
        ObjectCaptureSession.BeginNewScanPass();
    }
  }
}
public class ObjectCapture : MonoBehaviour
{
  // Starts the session with the provided output image directory and optional checkpoint directory.
  public void StartObjectCaptureSession()
  {
    ObjectCaptureSession.StartObjectCaptureSession();
  }
}
public class ObjectCapture : MonoBehaviour
{
  // Requests to stop the capture session and stop all data.
  public void StopObjectCaptureSession()
  {
    ObjectCaptureSession.StopObjectCaptureSession();
  }
}
public class ObjectCapture : MonoBehaviour
{
  // The method that updates the settings. Before using the feature, change the settings in the Object Capture for Unity Kit Settings.
  public void UpdateSettings()
  {
    ObjectCaptureSession.UpdateSettings();
  }
}
public class ObjectCapture : MonoBehaviour
{
  // Setting the target capture mode.
  public void ChangeCaptureMode(CaptureMode captureMode)
  {
    ObjectCaptureSession.SetCaptureMode(captureMode);
  }
}
public class ObjectCapture : MonoBehaviour
{
  // A func that specifies whether the visualization Point Cloud is hidden when scanning objects with default settings.
  public void HideShowPointCloudWhenCapturing(bool isHidden)
  {
    ObjectCaptureSession.HidePointCloudMTKViewWhenCapturing(isHidden);
  }
}
Photogrammetry Session
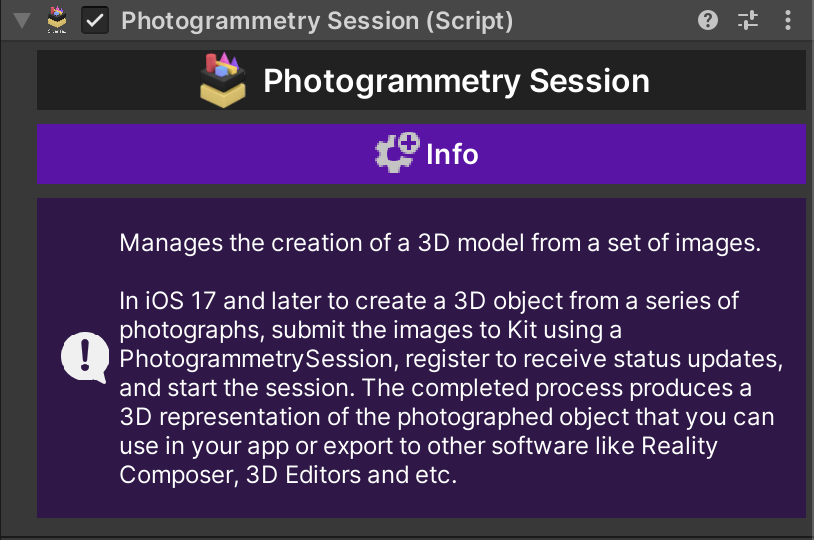
Manages the creation of a 3D model from a set of images.
In iOS 17 and later to create a 3D object from a series of photographs, submit the images to Kit using a PhotogrammetrySession, register to receive status updates, and start the session. The completed process produces a 3D representation of the photographed object that you can use in your app or export to other software like Reality Composer, 3D Editors and etc.
Events
| OnReconstruction |
An event that broadcasts data during the reconstruction of an object. |
Functions
| UpdateSettings |
The method that updates the settings. |
| StartPhotogrammetrySession |
Start a photogrammetry session.
"snapshotsFolder" - The snapshotsFolder directory is used as a temporary reconstruction space if it is not nil.
"imagesFolder" - Folder with pictures for reconstruction.
"modelsFolder" - Folder for output model.
|
| StopPhotogrammetrySession |
Requests cancellation of any running requests.
When cancellation has completed, a ".processingCancelled" message will be output and "isProcessing" will be "false". Calling this method has no effect if "!isProcessing".
Note: This call is asynchronous and it may take some time before the pipeline fully stops, resources are reclaimed, and the error is actually produced, so callers should monitor “output” for the message before making a new session.
|
| SetReconstructionOutputFileFormat |
Set the format of the reconstruction output file. Automatic mode is recommended. |
| SetFeatureSensitivity |
The precision of landmark detection.
The photogrammetry process relies on finding identifiable landmarks in the overlap between images. Landmarks can be hard to identify if the images don’t have enough contrast, aren’t in focus, or if the object is all one color and lacks surface detail.
|
| SetSampleOrdering |
The order of the image samples.
By default, Session assumes that image samples aren’t in any particular order. If you’re providing the images in order, with adjacent images next to each other, specifying for this value may result in better performance.
This setting has no impact on the quality of the produced object.
|
| SetReconstructionObjectMasking |
A Boolean value that indicates whether the session uses object masks.
If this value is true, but the samples don’t contain object masks, RealityKit attempts to automatically create a mask algorithmically. If it’s unable to create a mask, RealityKit reverts to reconstructing the object using the entire image.
If this value is true and the request’s samples do include object masks, RealityKit uses the provided masks to separate the foreground object from the background.
If this value is false, RealityKit doesn’t attempt to separate the sample foreground from the background, even if the samples have object masks.
|
| SetReconstructionIgnoreBoundingBox |
Ignores any bounding box information embedded in the input images and instead returns all possible geometry that can be automatically estimated using the image set. The resulting mesh will likely need post-processing.
Note: to recover the entire scene geometry as well as ignore the box, "isObjectMaskingEnabled" should also be set to false.
|
Examples of use:
public class ObjectCapture : MonoBehaviour
{
  // Start a photogrammetry session.
  public void StartPhotogrammetrySession()
  {
    // You can set your own paths to folders.
    var currentSnapshotsFolder = ObjectCaptureSession.CurrentSnapshotsFolder;
    var currentImagesFolder = ObjectCaptureSession.CurrentImagesFolder;
    var currentModelsFolder = ObjectCaptureSession.CurrentModelsFolder;

    PhotogrammetrySession.StartPhotogrammetrySession(currentSnapshotsFolder, currentImagesFolder, currentModelsFolder);
  }
}
public class ObjectCapture : MonoBehaviour
{
  // Stop a photogrammetry session. Requests cancellation of any running requests.
  public void StopPhotogrammetrySession()
  {
    PhotogrammetrySession.StopPhotogrammetrySession();
  }
}
public class ObjectCapture : MonoBehaviour
{
  // The method that updates the settings. Before using the feature, change the settings in the Object Capture for Unity Kit Settings.
  public void UpdateSettings()
  {
    PhotogrammetrySession.UpdateSettings();
  }
}
Camera Capture Image Session
Capture high-quality images with depth and gravity data to use with RealityKit Object Capture.
This module is a camera tool that enables the capture of high-quality images along with depth and gravity data. It allows for the creation of more realistic and accurate three-dimensional objects by not only capturing visual information about the object but also gathering data about its surroundings and physical characteristics. This contributes to a more comprehensive reproduction of objects in virtual space, significantly enhancing the realism and immersion of the scenes being created.
The main features of the module include:
- High-quality image capture: The module provides the ability to capture high-resolution images, which allows you to preserve the detail and realism of objects.
- Depth data collection: In addition to conventional images, the module also collects depth information about objects, allowing for more accurate rendering in three dimensions.
- Gravity data collection: Gravity data can be important for creating animations or effects related to the physical interaction of objects in the virtual world.
- Compatibility with RealityKit Object Capture: Captured data can be easily integrated with RealityKit Object Capture technology, allowing you to quickly and efficiently create 3D objects with a high degree of realism.
This module is a powerful tool for developers and artists working in the field of augmented and virtual reality, providing them with the ability to create better and more immersive visual effects and scenes.
Events
| OnImageCreated |
An event that is triggered by the data when you take a photo. |
Functions
| UpdateSettings |
The method that updates the settings. |
| StartSession |
Function that starts a session. |
| StopSession |
Function that stops the session. |
| CreateImage |
A function that allows you to create a picture (photo). |
| SetCustomCapturePath |
A function that allows you to specify a custom path for saving images (photos).
capturePath - Path to the target capture folder.
|
| SetCaptureDeviceType |
A function that allows you to specify the type of camera to be used.
deviceType - Type of camera.
|
| SetCaptureVideoSize |
A feature that allows you to specify the size of the camera viewer relative to your screen.
videoSize - The size of the camera viewer.
|
| SetCameraShutterNoiseStatus |
A function that allows you to mute the sound when creating a picture (photo). The feature works in test mode and may not work due to the photo creation policy.
status - Status value.
|
Static functions
| ConvertHEICtoJPG |
A function that allows you to convert HEIC files to JPG.
Be careful, the file size may exceed 20 MB.
heicPath - Path to the HEIC input file.
jpgPath - Path to the JPG output file.
compressionQuality - Compression quality.
|
| ConvertHEICtoPNG |
A function that allows you to convert HEIC files to PNG.
Be careful, the file size may exceed 20 MB.
heicPath - Path to the HEIC input file.
pngPath - Path to the PNG output file.
|
Properties
| IsCameraAvailable |
A value that indicates whether the camera is available. |
| IsHighQualityMode |
A value indicating whether High Quality mode is available. |
| IsDepthDataEnabled |
A value that indicates whether the Depth data is available. |
| IsMotionDataEnabled |
A value indicating whether Motion data is available. |
Examples of use:
public class CameraCapture : MonoBehaviour
{

  [SerializeField] private CameraCaptureImageSession cameraCaptureImageSession;

  // Object initialization function.
  public void StartPhotogrammetrySession()
  {
    // You can set your own paths to folders.
    cameraCaptureImageSession.SetCustomCapturePath(customCapturePath);
    cameraCaptureImageSession.StartSession();
  }
}
public class CameraCapture : MonoBehaviour
{
  [SerializeField] private CameraCaptureImageSession cameraCaptureImageSession;

  // Stop a Capture Image session. Requests cancellation of any running requests.
  public void StopPhotogrammetrySession()
  {
    cameraCaptureImageSession.StopSession();
  }
}
public class CameraCapture : MonoBehaviour
{
  private void OnEnable()
  {
    CameraCaptureImageSession.OnImageCreated += CameraCaptureImageSessionOnOnImageCreated;
  }

  private void OnDisable()
  {
    CameraCaptureImageSession.OnImageCreated -= CameraCaptureImageSessionOnOnImageCreated;
  }

  // Function - an event that is called when a picture (photo) is created.
  // heicPath - Output path to a HEIC image (photo).
  private void CameraCaptureImageSessionOnOnImageCreated(string heicPath)
  {
    Debug.Log(heicPath)
  }
}
public class CameraCapture : MonoBehaviour
{
  // A feature that allows you to specify the size of the camera viewer relative to your screen.
  private void OnChangeCaptureVideoSize(CaptureVideoSize type)
  {
    CameraCaptureImageSession.SetCaptureVideoSize(type);
  }
}
public class CameraCapture : MonoBehaviour
{
  // A function that allows you to specify the type of camera to be used.
  private void OnChangeCaptureDeviceType(CaptureDeviceType type)
  {
    CameraCaptureImageSession.SetCaptureDeviceType(type);
  }
}
public class CameraCapture : MonoBehaviour
{
  // A function that performs the action of creating an image (photo).
  private void CreateImage()
  {
    CameraCaptureImageSession.CreateImage();
  }
}
public class CameraCapture : MonoBehaviour
{
  // A function that provides information about the current session.
  // This will help you understand whether your current camera settings support the functionality you need.
  private void SessionInfo()
  {
    var highQualityInfo = cameraCaptureImageSession.IsHighQualityMode();
    var gravityInfo = cameraCaptureImageSession.IsMotionDataEnabled();
    var depthInfo = cameraCaptureImageSession.IsDepthDataEnabled();
  }
}
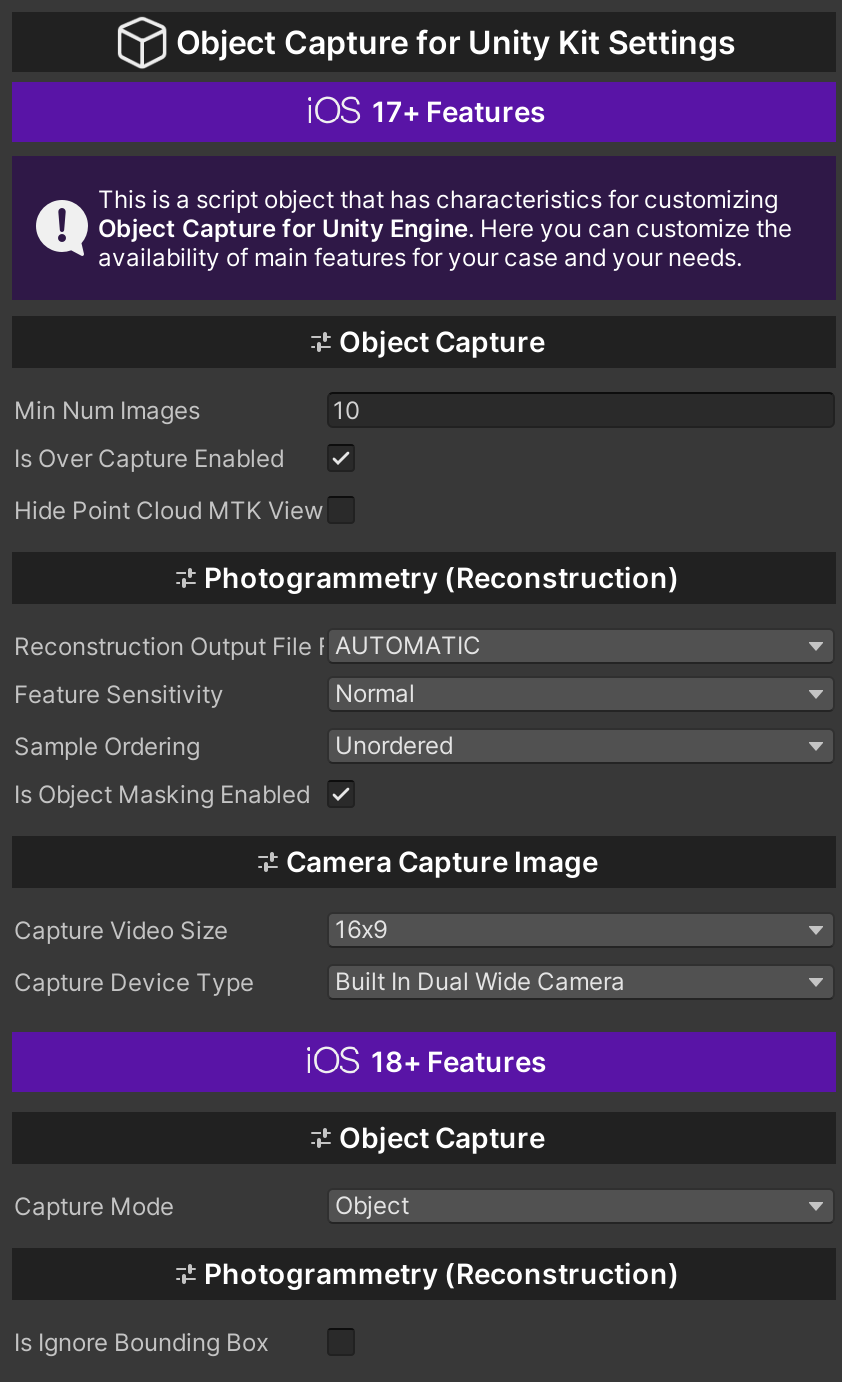
Object Capture for Unity Kit Settings
This is a script object that has characteristics for customizing Object Capture for Unity Engine. Here you can customize the availability of main functions for your case and needs.
Properties
| minNumImages |
A parameter that specifies the minimum number of images to perform a scan pass. |
| isOverCaptureEnabled |
Enables the session to continue capturing even after the number of captured images exceeds "maximumNumberOfInputImages". This setting is meant for use when the images are intended to be transferred to macOS for model reconstruction.
Note: The number of images used for on-device reconstruction will be limited to "maximumNumberOfInputImages" with any extra images skipped.
|
| hidePointCloudMTKViewWhenCapturing |
A parameter that specifies whether the visualization Point Cloud is hidden when scanning objects with default settings. |
| reconstructionOutputFileFormat |
Reconstruction output file format. |
| featureSensitivity |
The precision of landmark detection.
The photogrammetry process relies on finding identifiable landmarks in the overlap between images. Landmarks can be hard to identify if the images don’t have enough contrast, aren’t in focus, or if the object is all one color and lacks surface detail.
When property is set to "high", it instructs RealityKit to search an image for landmarks using an algorithm that analyzes an image closely and in detail. This slower, more sensitive process can produce an accurate 3D object even when landmarks are difficult to discern.
|
| sampleOrdering |
The order of the image samples.
By default, RealityKit assumes that image samples aren’t in any particular order. If you’re providing the images in order, with adjacent images next to each other, specifying "sequential" for this value may result in better performance.
This setting has no impact on the quality of the produced object.
|
| isObjectMaskingEnabled |
A Boolean value that indicates whether the session uses object masks.
If this value is true, but the samples don’t contain object masks, RealityKit attempts to automatically create a mask algorithmically. If it’s unable to create a mask, RealityKit reverts to reconstructing the object using the entire image.
If this value is true and the request’s samples do include object masks, RealityKit uses the provided masks to separate the foreground object from the background.
If this value is false, RealityKit doesn’t attempt to separate the sample foreground from the background, even if the samples have object masks.
|
| captureVideoSize |
This setting determines the size of the video format on your screen. |
| captureDeviceType |
This parameter is responsible for the type of camera that will be used. |
| captureMode |
Setting the target capture mode (Object/Area). |
| isIgnoreBoundingBox |
Ignores any bounding box information embedded in the input images and instead returns all possible geometry that can be automatically estimated using the image set. The resulting mesh will likely need post-processing.
Note: to recover the entire scene geometry as well as ignore the box, "isObjectMaskingEnabled" should also be set to false.
|
| doneButtonTitle |
Text displayed on the Done button. |
| doneButtonBackgroundColor |
Background color of the Done button. |
| doneButtonTitleColor |
Title color of the Done button. |
| doneButtonCornerRadius |
Corner radius of the Done button. |
| doneButtonFontSize |
Font size of the Done button title. |
| doneButtonBottomOffset |
Bottom offset from the safe area (in points). |
| doneButtonSize |
Size of the Done button (width x height, in points). |
Reconstruction Output
The ReconstructionOutput class is responsible for processing and managing the output data generated from 3D reconstruction processes. It provides an organized structure and methods to handle various types of reconstruction data, making it easier to integrate, visualize, and interact with in applications. This class acts as a bridge between raw reconstruction outputs and their practical usage in features such as 3D visualization, data analysis, or AR experiences.
Features:
1. Point Cloud Processing:
- Handles the 3D point cloud data, which represents the geometry of the scanned object or environment.
- Each point in the point cloud contains spatial position data and optional color information.
- Facilitates visualization and analysis of spatial geometry.
2. Pose Management:
- Processes pose data, which includes translations and rotations.
- Pose data helps in understanding the spatial alignment and movement of the reconstructed model or individual snapshots.
- Enables dynamic visualization of poses with smooth transitions.
3. Bounding Box Handling:
- Extracts and manages bounding box information, which defines the spatial limits of the reconstructed object.
- Useful for defining the object's extents and integrating with features like collision detection or scene scaling.
Use Cases:
- Visualization: This class is instrumental in visualizing reconstruction data, such as rendering point clouds, showing object poses, or displaying bounding boxes in 3D space.
- Integration: Simplifies the process of integrating reconstruction data into experiences by organizing and standardizing the data.
Properties
| PointCloud |
Provides access to the current Point Cloud data by parsing the file specified by "PointCloudFileName".
The Point Cloud contains an array of points with attributes like position and color, representing the scanned object's or environment's geometry.
This property ensures that the Point Cloud is dynamically parsed and kept up-to-date with the latest data.
|
| Poses |
Provides access to the current Poses data by parsing the file specified by "PosesFileName".
Poses data includes transformations such as translations and rotations, which are used to visualize or analyze the movement and orientation of the captured object or environment.
This property ensures that the poses are dynamically parsed and updated as needed.
|
| BoundingBox |
Provides access to the current Bounding Box data by parsing the file specified by "BoundingBoxFileName".
The Bounding Box data defines the 3D limits of the scanned object or environment, including minimum and maximum coordinates in the X, Y, and Z axes.
This property dynamically retrieves and updates the bounding box information as required.
|
| PointCloudFileName |
The name of the file containing Point Cloud data.
This file stores information about the reconstructed 3D point cloud, including spatial positions and optional color data for each point.
By default, the file is named "PointCloud.json".
Adjust this property to load Point Cloud data from a custom file name.
|
| PosesFileName |
The name of the file containing Poses data.
This file defines the spatial transformations (translation and rotation) associated with specific snapshots or scans, allowing pose visualization or alignment.
By default, the file is named "Poses.json".
Modify this property to load Poses data from a different file if necessary.
|
| BoundingBoxFileName |
The name of the file containing Bounding Box data.
This file describes the dimensions and coordinates of the axis-aligned bounding box that encloses the reconstructed 3D object or scene.
By default, the file is named "BoundingBox.json".
Update this property if a different file name is used for bounding box information.
|
Examples of use:
public void Run(string snapshotsFolderPath)
{
  var reconstructionOutput = new ReconstructionOutput(snapshotsFolderPath);

  var pointCloudData = reconstructionOutput.PointCloud;

  if (pointCloudData != null)
  {
    Debug.Log($"PointCloud received with {pointCloudData.Points.Count} items.");
  }

  var posesData = reconstructionOutput.Poses;

  if (posesData != null)
  {
    Debug.Log($"Poses received with {posesData.PosesBySample.Count} items.");
  }

  var boundingBoxData = reconstructionOutput.BoundingBox;

  if (boundingBoxData != null)
  {
    Debug.Log($"BoundingBoxData is received.");
  }
}
Photogrammetry Session (macOS)
Manages the creation of a 3D model from a set of images.
In macOS 15 and later to create a 3D object from a series of photographs, submit the images to Kit using a PhotogrammetrySession, register to receive status updates, and start the session. The completed process produces a 3D representation of the photographed object that you can use in your app or export to other software like Reality Composer, 3D Editors and etc.
Events
| OnReconstruction |
An event that broadcasts data during the reconstruction of an object. |
Functions
| UpdateSettings |
The method that updates the settings. |
| StartPhotogrammetrySession |
Start a photogrammetry session.
"imagesFolder" - Folder with pictures for reconstruction.
"modelName" - The name of the output model.
"modelFolder" - Folder for output model.
|
| StopPhotogrammetrySession |
Requests cancellation of any running requests.
When cancellation has completed, a ".processingCancelled" message will be output and "isProcessing" will be "false". Calling this method has no effect if "!isProcessing".
Note: This call is asynchronous and it may take some time before the pipeline fully stops, resources are reclaimed, and the error is actually produced, so callers should monitor “output” for the message before making a new session.
|
| SetIgnoreBoundingBox |
Ignores any bounding box information embedded in the input images and instead returns all possible geometry that can be automatically estimated using the image set. The resulting mesh will likely need post-processing.
Note: to recover the entire scene geometry as well as ignore the box, "isObjectMaskingEnabled" should also be set to false.
|
| SetObjectMasking |
Boolean value that indicates whether the session uses object masks.
If this value is true, but the samples don’t contain object masks, RealityKit attempts to automatically create a mask algorithmically. If it’s unable to create a mask, RealityKit reverts to reconstructing the object using the entire image.
|
| SetMeshPrimitive |
On macOS, this property can be used to change the output geometry mesh primitive for all output geometry in the session, regardless of “Detail“ setting.
This will also change the mesh primitives in both OBJ and USD outputs.
By default, triangle meshes are created.
|
| SetDetailQualityLevel |
Supported levels of detail for a request.
On macOS, RealityKit object creation can generate models at different levels of detail. Higher levels of detail may take longer to create, require more memory and processing power to generate, and create objects with more complex geometry and texture requirements.
Each detail level corresponds to an object of a specific size and complexity. Here’s the expected final size of the generated object from each detail level.
| Detail Level | Triangles | Estimated File Size |
| ------------ | --------- | ------------------- |
| `.preview` | 25k | ≈5MB |
| `.reduced` | 50k | ≈10MB |
| `.medium` | 100k | ≈30MB |
| `.full` | 250k | ≈100MB |
| `.raw` | 30M | Varies |
| `.custom` | Varies | Varies |
Create Texture Maps
Each detail level produces a 3D object with texture maps. The higher the complexity level, the larger the generated texture maps, and the more memory the system requires to display those objects in an AR scene.
RealityKit creates five texture maps at the `.full` detail level: a single diffuse map, normal map, ambient occlusion map, roughness map, and displacement map. For `.preview`, `.reduced`, and `.medium` detail levels, it produces just the single diffuse, normal and ambient occlusion maps.
When producing a model at the `.raw` detail level, only diffuse texture maps are created, but RealityKit may create up to 16 diffuse maps, each covering different parts of the model. Raw models are produced at the highest resolution possible from the source images, so they don’t benefit from having the other types of texture maps, which are used to supplement a low-resolution model with data from a higher-resolution version of the same model.
Here are the texture map sizes generated for each detail level and the amount of texture memory the uncompressed textures use at runtime.
| Detail Level | Texture Size | Texture Memory Required |
| ------------ | ------------ | ----------------------- |
| `.preview` | 1024 x 1024 | 10.666667 MB |
| `.reduced` | 2048 x 2048 | 42.666667 MB |
| `.medium` | 4096 x 4096 | 170.666667 MB |
| `.full` | 8192 x 8192 | 853.33333 MB |
| `.raw` | 8192 x 8192 (multiple) | Varies |
| `.custom` | Varies | Varies |
|
| SetCustomPolygonCount |
The upper limit on polygons in the model mesh.
Note: this is an upper bound to control the amount of decimation performed on complicated meshes to allow the user to target specific renderer resource budgets, and not a specification for how many polygons to use. Specifically, for less complex models, the actual number of polygons may be ,significantly less than this value -- the algorithm will use as many as it deems necessary (within this limit) to accurately represent the reconstructed model.
|
| SetCustomTextureFormat |
The data type of the texture map. |
| SetCustomTextureMapOutputs |
Allows specification of the set of output texture maps to be included in the output model. |
| SetCustomTextureResolution |
One of the discrete texture dimensions to specify the size of the model texture maps.
For example, a “.twoK“ dimension means the texture map size can be up to size 2048x2048.
|
Examples of use:
public class CustomScript : MonoBehaviour
{
  // Start a photogrammetry session.
  public void StartPhotogrammetrySession(string imageFolderPath, string modelName, string modelFolderPath)
  {
    if (!Directory.Exists(imageFolderPath))
    {
        Debug.Log("Error: Directory is null!");
        return;
    }

    if (!Directory.Exists(modelFolderPath))
    {
        Debug.Log("Error: Directory is null!");
        return;
    }

    if (string.IsNullOrEmpty(modelName))
    {
        Debug.Log("Error: Model Name is empty!");
        return;
    }

    PhotogrammetryMacOSSession.StartPhotogrammetrySession(imageFolderPath, modelName, modelFolderPath);
  }
}
public class CustomScript : MonoBehaviour
{
  // Stop a photogrammetry session. Requests cancellation of any running requests.
  public void StopPhotogrammetrySession()
  {
    PhotogrammetryMacOSSession.StopPhotogrammetrySession();
  }
}
public class CustomScript : MonoBehaviour
{
  // The method that updates the settings.
  public void UpdateSettings()
  {
    PhotogrammetryMacOSSession.UpdateSettings();
  }
}
Photogrammetry Settings (macOS)
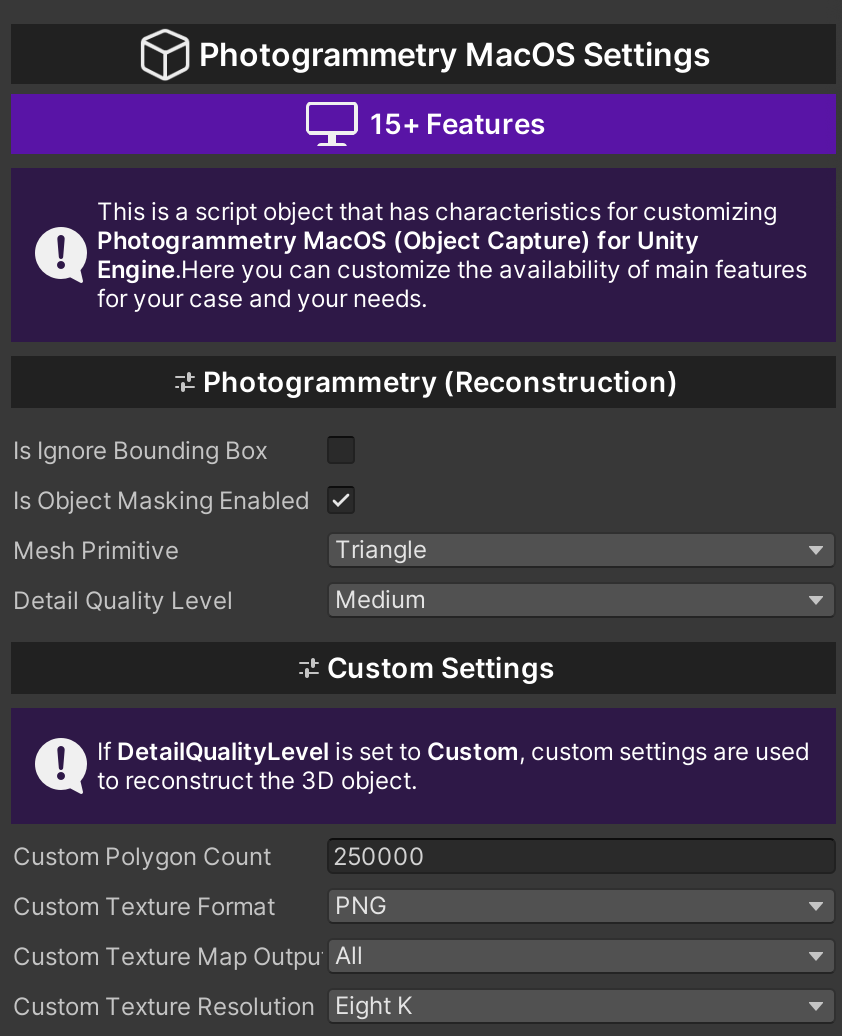
This is a script object that has characteristics for customizing Photogrammetry MacOS (Object Capture) for Unity Engine. Here you can customize the availability of main functions for your case and needs.
Properties
| isIgnoreBoundingBox |
Ignores any bounding box information embedded in the input images and instead returns all possible geometry that can be automatically estimated using the image set. The resulting mesh will likely need post-processing.
Note: to recover the entire scene geometry as well as ignore the box, "isObjectMaskingEnabled" should also be set to false.
|
| isObjectMaskingEnabled |
Boolean value that indicates whether the session uses object masks.
If this value is true, but the samples don’t contain object masks, RealityKit attempts to automatically create a mask algorithmically. If it’s unable to create a mask, RealityKit reverts to reconstructing the object using the entire image.
|
| meshPrimitive |
On macOS, this property can be used to change the output geometry mesh primitive for all output geometry in the session, regardless of “Detail“ setting.
This will also change the mesh primitives in both OBJ and USD outputs.
By default, triangle meshes are created.
|
| detailQualityLevel |
Supported levels of detail for a request.
On macOS, RealityKit object creation can generate models at different levels of detail. Higher levels of detail may take longer to create, require more memory and processing power to generate, and create objects with more complex geometry and texture requirements.
Each detail level corresponds to an object of a specific size and complexity. Here’s the expected final size of the generated object from each detail level.
| Detail Level | Triangles | Estimated File Size |
| ------------ | --------- | ------------------- |
| `.preview` | 25k | ≈5MB |
| `.reduced` | 50k | ≈10MB |
| `.medium` | 100k | ≈30MB |
| `.full` | 250k | ≈100MB |
| `.raw` | 30M | Varies |
| `.custom` | Varies | Varies |
Create Texture Maps
Each detail level produces a 3D object with texture maps. The higher the complexity level, the larger the generated texture maps, and the more memory the system requires to display those objects in an AR scene.
RealityKit creates five texture maps at the `.full` detail level: a single diffuse map, normal map, ambient occlusion map, roughness map, and displacement map. For `.preview`, `.reduced`, and `.medium` detail levels, it produces just the single diffuse, normal and ambient occlusion maps.
When producing a model at the `.raw` detail level, only diffuse texture maps are created, but RealityKit may create up to 16 diffuse maps, each covering different parts of the model. Raw models are produced at the highest resolution possible from the source images, so they don’t benefit from having the other types of texture maps, which are used to supplement a low-resolution model with data from a higher-resolution version of the same model.
Here are the texture map sizes generated for each detail level and the amount of texture memory the uncompressed textures use at runtime.
| Detail Level | Texture Size | Texture Memory Required |
| ------------ | ------------ | ----------------------- |
| `.preview` | 1024 x 1024 | 10.666667 MB |
| `.reduced` | 2048 x 2048 | 42.666667 MB |
| `.medium` | 4096 x 4096 | 170.666667 MB |
| `.full` | 8192 x 8192 | 853.33333 MB |
| `.raw` | 8192 x 8192 (multiple) | Varies |
| `.custom` | Varies | Varies |
|
| customPolygonCount |
The upper limit on polygons in the model mesh.
Note: this is an upper bound to control the amount of decimation performed on complicated meshes to allow the user to target specific renderer resource budgets, and not a specification for how many polygons to use. Specifically, for less complex models, the actual number of polygons may be ,significantly less than this value -- the algorithm will use as many as it deems necessary (within this limit) to accurately represent the reconstructed model.
|
| customTextureFormat |
The data type of the texture map. |
| customJpgCompressionQuality |
A parameter that allows you to set the compression quality of the JPG format of images (textures). |
| SetCustomTextureMapOutputs |
Allows specification of the set of output texture maps to be included in the output model. |
| SetCustomTextureResolution |
One of the discrete texture dimensions to specify the size of the model texture maps.
For example, a “.twoK“ dimension means the texture map size can be up to size 2048x2048.
|
Quick Look
When showing files in your app, including the ability to quickly preview a file and its content can be helpful to your users. For example, you may want to allow users to zoom into a photo, play back an audio file, and so on. Use the Quick Look framework to show a preview of common file types in your app that allows basic interactions.
Quick Look can generate previews for common file types, including:
- iWork and Microsoft Office documents;
- Images;
- Live Photos;
- Text files;
- PDFs;
- Audio and video files;
- Augmented reality objects that use the USDZ file format (iOS and iPadOS only);
Note
The list of supported common file types may change between operating system releases.
Examples of use:
public class CustomQuickLook : MonoBehaviour
{
  // A function that opens the object for quick viewing.
  public void QuickLook()
  {
    QuickLook.OpenQuickLook(string path);
  }
}
Flashlight
This is an assistant utility that is responsible for the operation of the device's flashlight.
Examples of use:
public class CustomFlashlight : MonoBehaviour
{
  // A function that allows you to control the device's flashlight.
  public void SetFlashlightStatus(bool value)
  {
    Flashlight.SetFlashlightStatus(value);
  }
}
OBJ Utility
Using the utilities developed and built into the plugin, you can easily import Unity models into both the Runtime and Editor.
MTL Settings:
MTL Settings is responsible for synchronizing the parameters of the target shader (color, main texture, normal map, etc.) with the parameters that will be used to read/write the model settings when importing or exporting it.
Below is a table with a list of parameters and their descriptions.
| colorValue |
Color parameter (Color rgba) |
| mainTextureValue |
Diffuse map (Texture2D) |
| specColorValue |
Specular color (Color rgba) |
| bumpMapValue |
Bump map - Normal map (Texture2D) |
| bumpScaleValue |
Bump - Normal intensity (Float) |
| emissionMapValue |
Emission map (Texture2D) |
| emissionColorValue |
Emission color (Color rgba) |
| specGlossMapValue |
Specular map (Texture2D) |
| specularIntensityValue |
Specular intensity (Float) |
| metallicGlossMapValue |
Metallic map (Texture2D) |
| metallicValue |
Metalness parameter (Float) |
| glossinessValue |
Glossiness - Smoothness (Float) |
| ambientOcclusionMapValue |
Ambient Occlusion map (Texture2D) |
| ambientOcclusionIntensityValue |
Ambient Occlusion intensity (Float) |
Examples of use:
public class CustomOBJ : MonoBehaviour
{
  // Import an OBJ file from a file path. This function will also attempt to load the MTL defined in the OBJ file.
  public void Import(string path, Shader shader, MTLSettings mtlSettings = null)
  {
    var importObject = OBJUtility.Import(path, shader, mtlSettings);
  }

  // Import an OBJ and MTL file from a file path.
  public void Import(string path, string mtlPath, Shader shader, MTLSettings mtlSettings = null)
  {
    var importObject = OBJUtility.Import(path, mtlPath, shader, mtlSettings);
  }

  // Import an OBJ file from a stream. No materials will be loaded, and will instead be supplemented by a blank white material.
  public void Import(Stream input, Shader shader, MTLSettings mtlSettings = null)
  {
    var importObject = OBJUtility.Import(input, shader, mtlSettings);
  }

  // Import an OBJ and MTL file from a stream.
  public void Import(Stream input, Stream mtlInput Shader shader, MTLSettings mtlSettings = null)
  {
    var importObject = OBJUtility.Import(input, mtlInput, shader, mtlSettings);
  }
}
public class CustomOBJ : MonoBehaviour
{
  // Export game object to OBJ format model.
  public void Export(GameObject exportObject, string path, string modelName, MTLSettings mtlSettings = null)
  {
    if(string.IsNullOrEmpty(path)) return;

	if (!Directory.Exists(path))
	{
		Directory.CreateDirectory(path);
	}

	path = Path.Combine(path, modelName + ".obj");
	OBJUtility.Export(path, exportObject.transform, mtlSettings);
  }
}
Share
Your app can share any files and folders. Share utility is a simple way to share content from one app to another, even from different developers.
Examples of use:
public class CustomShare : MonoBehaviour
{
  // A function that allows you to share a folder.
  public void ShareFolder()
  {
    Share.ShareFolder(string directoryPath);
  }

  // A function that allows you to share a file.
  public void ShareFile()
  {
    Share.ShareFile(string path);
  }
}
USDZ Utility
Using the utility, you can easily export 3D Unity Game Objects and convert .OBJ models to .USDZ models.
Examples of use:
public class ExportUSDZ : MonoBehaviour
{
    [SerializeField]
    [Tooltip("Target GameObject.")]
    private GameObject targetGameObject;

    [SerializeField]
    [Tooltip("The name of the model file.")]
    private string outputUSDZFilename = "result_model";

    [Tooltip("Target material settings for the model to be imported.")]
    [SerializeField] private MTLSettings mTLSettings;

    private string _outputPath;

    private void Start()
    {
       _outputPath = Path.Combine(Application.persistentDataPath);
    }

    // The function allows you to export any 3D GameObject to the .USDZ model format.
    private void ExportGameObjectToUSDZ()
    {
        USDZUtility.ExportObjectToUSDZ(targetGameObject, _outputPath, outputUSDZFilename, mTLSettings);
    }
}
public class ConvertOBJ : MonoBehaviour
{
    [SerializeField]
    [Tooltip("The name of the model file.")]
    private string outputUSDZFilename = "result_model";

    [SerializeField]
    [Tooltip("Path to the .OBJ model file. For the test, we use the streamingAssetsPath. If you plan to change the path, do not forget to make changes to the code.")]
    private string inputOBJFilePath = "USDZUtility/model/silvertau_logo.obj";

    private string _outputPath;

    private void Start()
    {
       _outputPath = Path.Combine(Application.persistentDataPath);
    }

    // The function allows you to convert any .OBJ model file to the .USDZ model format.
    private void ConvertOBJToUSDZModel()
    {
        var pathObj = Path.Combine(Application.streamingAssetsPath, inputOBJFilePath);

        if (!File.Exists(pathObj))
        {
            return;
        }

        USDZUtility.ConvertOBJToUSDZ(pathObj, _outputPath, outputUSDZFilename);
    }
}
What's new
Version [1.6.3]
Added
- UI customization features for the Done button for the object resizing function;
Updated
- Object Capture for Unity framework;
- Object Capture for Unity libs;
- Object Capture Session;
- Object Capture for Unity Kit Settings;
- Updated the “Done” button when using the object resizing feature;
- Optimization for iOS 26+;
- Optimization for macOS 26+;
- Documentation;
Fixed
- The “Done” button when using the object resizing function;
- Minor bugs;
Upgrade guide
You can easily upgrade to a new version of the package without any problems for your project.
Changelog
Expand
## [1.6.3]
### Added
- UI customization features for the Done button for the object resizing function;

### Updated
- Object Capture for Unity framework;
- Object Capture for Unity libs;
- Object Capture Session;
- Object Capture for Unity Kit Settings;
- Updated the “Done” button when using the object resizing feature;
- Optimization for iOS 26+;
- Optimization for macOS 26+;
- Documentation;

### Fixed
- The “Done” button when using the object resizing function;
- Minor bugs;

## [1.6.2]
### Added
- Support for iOS 26+;
- Support for macOS 26+;
- Support for running the framework on unsupported devices;
- Support for all plugin features on unsupported devices (except for object scanning and photogrammetry);
- Full compatibility with Camera Capture Image Session for unsupported devices;

### Updated
- Object Capture for Unity framework;
- Object Capture for Unity libs;
- General plugin optimization;
- Optimization for iOS 18+;
- Optimization for macOS 15+;
- QuickLook utility;
- Documentation;

### Fixed
- Minor bugs;

## [1.6.1]
### Added
- dSYM;

### Updated
- Object Capture for Unity framework;
- Object Capture for Unity libs;
- Documentation;

### Fixed
- Warning about missing dSYM in Xcode;
- Minor bugs;

## [1.6.0]
### Added
- Photogrammetry support for macOS platform;
- Object Capture for Unity framework (macOS);
- Photogrammetry Settings (macOS);
- Example for Photogrammetry (macOS);

### Updated
- Object Capture for Unity framework;
- Object Capture for Unity libs;
- Object Capture Session;
- Photogrammetry Session;
- Optimization of the ObjectCaptureSession;
- Optimization of Camera Capture Image Session;
- Optimization of the Photogrammetry Session;
- Documentation;

### Fixed
- A bug with the “Done” button when resizing objects in the default scan example;
- Memory leaks;
- Minor bugs;

## [1.5.2]
### Added
- Point Cloud visibility option for default scanning (MTKView in Settings SO);

### Updated
- Object Capture for Unity framework;
- Object Capture for Unity libs;
- Object Capture Session;
- Photogrammetry Session;
- Camera Capture Image Session;
- Object Capture for Unity Kit Settings;
- Optimization of the ObjectCaptureSession;
- Optimization of Camera Capture Image Session;
- Optimization of the Photogrammetry Session;
- Model Viewer;
- Samples;
- Documentation;

### Fixed
- Memory leaks;
- Minor bugs;

## [1.5.1]
### Updated
- Object Capture for Unity framework;
- Object Capture for Unity libs;
- Photogrammetry Session;
- Reconstruction Outputs;
- Output Models;
- Optimization;
- OBJ Utility;
- Samples;

### Fixed
- Centering the position (pivot point) of 3D objects when scanning and reconstructing objects;
- Minor bugs;

## [1.5.0]
### Added
- Reconstruction Outputs;
- Point cloud output and rendering;
- Poses output and visualization;
- Bounding box output and visualization;
- Example for Model Scan Visualization;

### Updated
- Object Capture for Unity framework;
- Object Capture for Unity libs;
- Photogrammetry Session;
- Documentation;
- Samples;

### Fixed
- Minor bugs;

## [1.4.0]
### Added
- iOS 18 Support;
- Capture mode (Object/Area);
- Option to ignore any information about the bounding box;

### Updated
- Object Capture for Unity framework;
- Object Capture for Unity libs;
- Object Capture Session;
- Photogrammetry Session;
- Object Capture Settings;
- Samples;

### Fixed
- Minor bugs;

## [1.3.0]
### Updated
- Object Capture for Unity framework;
- Object Capture for Unity libs;
- Camera Capture Image Session;
- Initialize functions;
- USDZ Utility;
- Share Utility;
- QuickLook utility;
- An example of the USDZ utility;
- An example of the Share utility;
- An example of the QuickLook utility;
- Demo files (StreamingAssets);

### Fixed
- Minor bugs;

## [1.2.3]
### Updated
- Object Capture for Unity framework;
- Initialize and dispose functions;
- Object Capture for Unity libs;
- Object Capture Session;
- Samples;

### Fixed
- Minor bugs;

## [1.2.2]
### Added
- Assist functions for managing the scan size;

### Updated
- Object Capture for Unity framework;
- Auto-rotate the camera session;
- Object Capture for Unity libs;
- Camera Capture Image Session;
- Object Capture Session;
- OBJ Utility;
- Samples;

### Fixed
- Initializing the camera in landscape mode;
- Minor bugs;

## [1.2.1]
### Added
- Camera Capture Image Session;
- Camera landscape mode for CCI Session;

### Updated
- Object Capture for Unity framework;
- Object Capture for Unity libs;
- Object Capture Session;
- Auto-rotate the camera session;
- OBJ Utility;
- USDZ Utility;
- Samples;

### Fixed
- Minor bugs;

## [1.2.0]
### Added
- Camera Capture Image Session;
- High-quality image capture;
- Depth data collection;
- Gravity data collection;
- Camera viewer;
- Ability to select the camera type;
- HEIC image conversion functions (to PNG & JPG);
- Example of interaction and work for the module Camera Capture Image;

### Updated
- Object Capture for Unity framework;
- Object Capture for Unity libs;
- Object Capture Session;
- Object Capture Settings;
- OBJ Utility;
- Samples;

### Fixed
- Minor bugs

## [1.1.0]
### Added
- The new USDZ utility;
- An example of the USDZ utility;
- An example of the OBJ utility;
- An example of the Share utility;
- An example of the QuickLook utility;
- An example of the Flashlight utility;

### Updated
- OBJ Utility;
- Samples;
- New functionality for ObjectCaptureSession;
- Advanced features for Share Utility and OBJ Utility;
- Object Capture for Unity framework;
- Object Capture for Unity libs;

### Fixed
- Minor bugs;

## [1.0.1]
### Added
- MTL Settings for Standard & URP (OBJ Utility);

### Updated
- OBJ Utility;
- Share Utility;
- Samples;
- Plugin validation function;
- Object Capture for Unity framework;
- Object Capture for Unity libs;

### Fixed
- Minor bugs;

## [1.0.0]
### Added
- First release;
Issues
Issues are used to track errors, bugs, etc.
libc++abi: terminating due to uncaught exception of type Il2CppExceptionWrapper
Full description of the error:
warning: Module "/Users/labo/Library/Developer/Xcode/iOS DeviceSupport/iPhone13,3 17.0.3 (21A360)/Symbols/usr/lib/system/libsystem_kernel.dylib" uses triple "arm64e-apple-ios17.0.0", which is not compatible with the target triple "arm64-apple-ios17.0.0". Enabling per-module Swift scratch context.
Cause of the error
This is a fairly common error. The reason for the error is that the Unity Engine temporary files are not written correctly. The solution to the problem is not presented below and is completely safe for your project.
Fix:
To resolve the error, you need to delete the "Library" folder in the project's root folder and restart the Unity project. After that, you can safely build your application.
Warning: Upload Symbols Failed (Xcode 16+)
Full description of the error:
The archive did not include a dSYM for the ObjectCaptureAPIForUnity.framework with the UUIDs [00000000-0000-0000-0000-008000000000]. Ensure that the archive's dSYM folder includes a DWARF file for ObjectCaptureAPIForUnity.framework with the expected UUIDs.
Cause of the error
The Upload Symbols Failed warning indicates that the .dSYM file for the ObjectCaptureAPIForUnity.framework is missing or does not match the UUID. The warning may occur because the .dSYM file for the framework was not created when building the project with Unity. The warning is not critical and can be ignored as it does not affect the operation of the application.
Fix:
To resolve the issue, try generating a dSYM manually for the .framework and adding it to the Project Archive.
1. Use the dsymutil command to create dSYM for .framework:
dsymutil PathToFramework/ObjectCaptureAPIForUnity.framework/ObjectCaptureAPIForUnity -o PathToOutput/ObjectCaptureAPIForUnity.framework.dSYM
2. Archive your project in Xcode (or use an already archived one) and navigate to it in the Finder.
3. Right-click on the archived project and view its contents.
4. Add the generated .dSYM to the dSYMs folder.
5. Done. Now you can try validating your app to check for errors.
